

Unlike latter two-stroke Vespas (specifically the PX), the GS 160 and SS180 have the distinct advantage that the wheel bearings can be replaced in the home workshop. This is without requiring the removal of the forks or the hub to aid this repair.
STRIP-DOWN
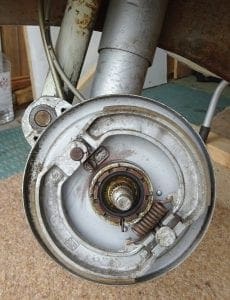
After the removal of the entire hub and rim/tyre assembly, the backplate of the hub with the brake shoes is revealed.
Although not strictly necessary – the hub bearings can be removed with these brake shoes in situ; it is however, good practice to remove the two brake shoes to save any contamination by lubricants associated with this task. his will additionally allow a chance to clean out any dust (use a damp rag for this, as old shoes contain asbestos). Also, on reassembly, a thin smear of Copperslip-type grease can be applied to the brake shoe pivot pins to aid braking and future removal.
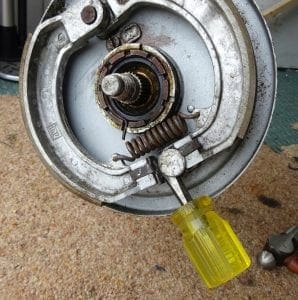
The next step is to remove the large castellated nut in the hub centre that actually retains the stub axel and bearing assembly as well as the oil seal that prevent grease leaching-out onto the brake shoes. This nut is prevented from loosening by a wire circlip – this must be released first.
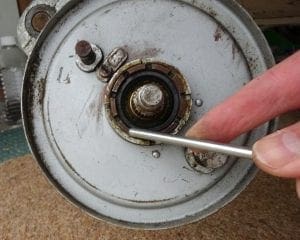
There is a purpose-made tool (a species of peg spanner) for removing the castellated nut without damaging the fixing, but this tool must come with a word of warning – the one supplied for the task in question had been poorly made and the locating ‘turret’-style lugs did not fit into the castellations machined into the nut. In this case, the old standby of using a suitable steel drift to rotate the nut was employed. [Please note: this is a left-handed thread].
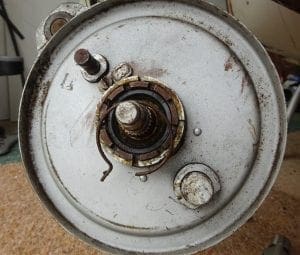
The side face of the bearing will be revealed on the removal of the castellated nut.

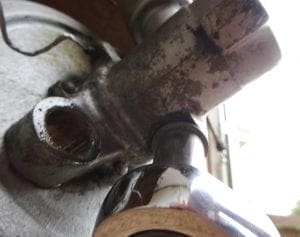
To prevent damage to the speedo worm drive, the speedo cable must be removed, followed by the speedo worm drive itself.
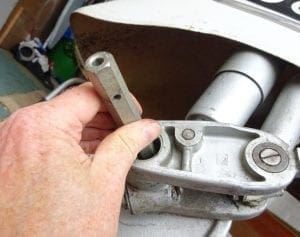
The aluminium (standard) or pressed steel (accessory) trailing link embellisher must now be prised-off the front fork trailing suspension link to reveal the dust cover to the stub axel and bearings.
Using a suitable drift and minimal blows from a hammer, the dust cover and shaft that sits behind it can be now be knocked through from the trailing link out.
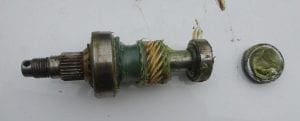
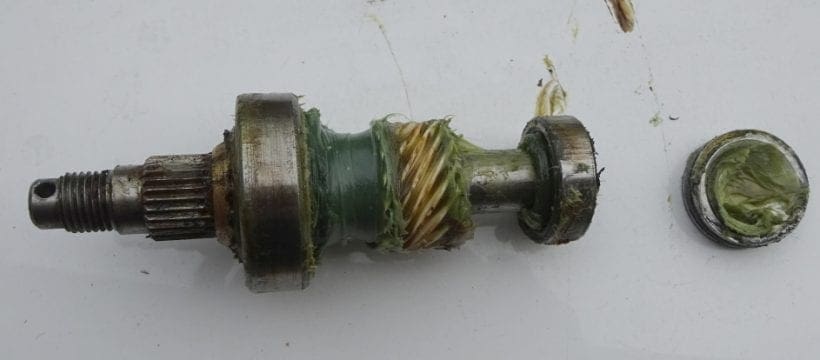
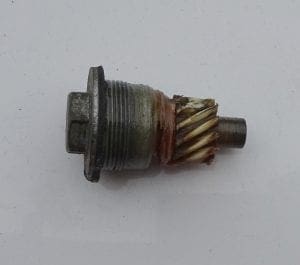
This pic shows the old stub axle and bearing assembly.
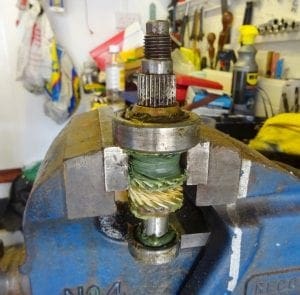
Sitting the bearings over or in the jaws of a bench vice will allow the stub axle to be knocked through to release the two bearings. Use a hide or copper faced mallet for this task so as to not damage the shaft.
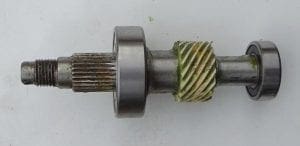
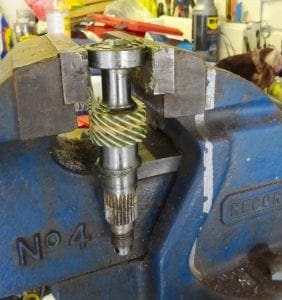
This pic shows the reassembled stub axle. Note here that the bearing inner ring is an interference fit on the axle. No pressure should be put on the outer ring of either bearing when assembling the stub axle. A steel tube of a suitable diameter to slide over the shaft and to bear on the inner ring of each bearing must be used as a drift to tap the bearings into place. Suitable sized box spanners are ideal for this purpose. Each bearing must end up flush with the machined face on each end of the shaft to be in the correct position for reassembly. On no account must the outer bearing rings be hammered – this will inevitably damage the bearings.
RE-ASSEMBLY
This is the reverse process of the hub strip. Don’t forget to tap the shaft dust cover into place first from the inside – a suitable diameter socket is ideal for this. The shaft can then be gently tapped into position until the far end is flush with the cap.
A TIP HERE…
The original bearings sat in high melting point grease as a form of lubrication. It is possible (and probably preferable) for ‘sealed for life’ bearings to be substituted. These have the advantage of not releasing grease that might contaminate the brake shoes if the oil seal fails.
2ND TIP…
Buy the bearings from a bearing supplier and pay cash – our two bearings cost a very reasonable £12.
Vespita