
Working on fifty-year-old scooters like a GS160 is bound to throw unwanted side effects into the mix and our current example had a problem with petrol, or – to be totally honest – a large amount of unwanted petrol spilling out from anywhere it could!
The suspicion now is that this particular machine had a long running love/hate relationship with fuel for an extended period of its previous existence. Not only did the petrol tap disintegrate when the tank was removed (luckily there was only a small amount of very stale petrol in the tank), but it also appeared that the carburettor had been leaking over a long period of time. This was witnessed by the fact that the engine cowling was gummed in place by a thick gunge of congealed oil – self-evidently oil that had run down in the petrol mix from the carb. Quite how this venerable engine ran in this condition without overheating and seizing will forever remain something of a mystery?
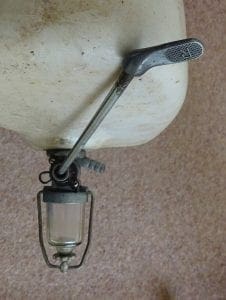
PETROL TAP
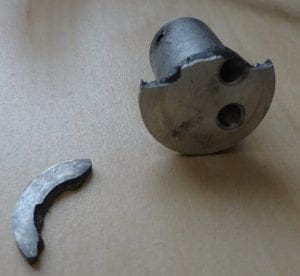
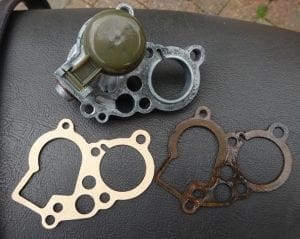
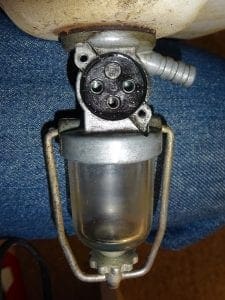
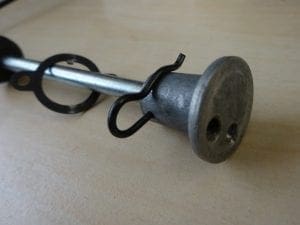
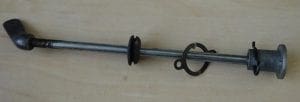
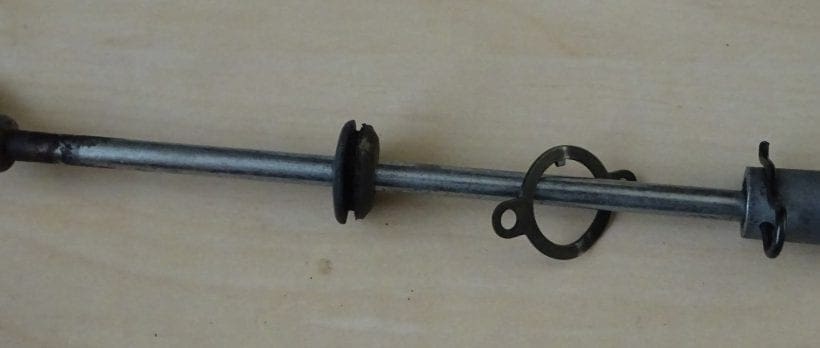
The classic scooter petrol tap is a ‘labyrinth tap’ which, as its name suggests, allows more than one path for the flow of fuel to follow. Unfortunately, the moving centre element of this particular tap had broken into two sections across the flange that seals against flat face of the tap body (there is, additionally, a rubberised interface matching these two parts that renders the seal petrol tight).
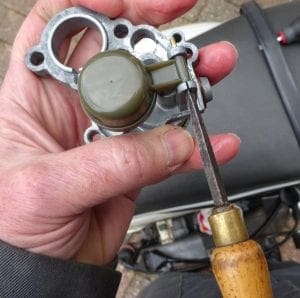
Happily, a matching replacement for the broken part was sourced from Bill Drake, thereby allowing the original tap to be restored to its former working condition. This replacement is easily fitted by removing two raised-headed slotted screws that hold the pressure spring at the front of the tap in place [a small note here: It’s not necessary to over-tighten these two screws on reassembly; doing so will make the operating of the fuel control rod very stiff]. It’s best to tighten these two screws to the point where – and with a small amount of petrol in the tank to check this – the seal just holds back any seepage of fuel from the tap components. This is obviously a ‘trial and error’ task.
LEAKY CARB
It was quite disappointing on completing the refurb of the old GS, to turn on the petrol, pull-out the choke and kick-start the engine into life, only to notice, after a couple of minutes that petrol was to be observed dripping onto the ground under the engine. Expletives deleted at this point!
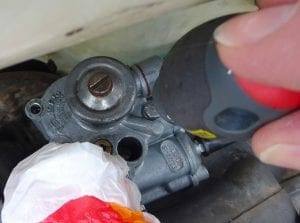
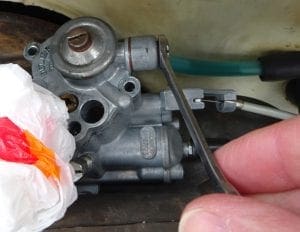
Now, we knew at this stage that this leak wasn’t from the petrol tap and new petrol pipe tubing had been fitted, so that couldn’t be the cause? This left the hidden carb as the only possible culprit for this escape of precious fuel. Hidden, that is, under the air filter. Once again the air filter box was removed and sure enough, we were faced with a very wet carb carelessly liberating expensive petrol to the environment. More expletives, on the grounds that the carb had been meticulously cleaned, new gaskets fitted and a new needle valve had been sourced (but from old stock, unfortunately)! The culprit was the needle valve not shutting-off the fuel flow to the carb as the float rose in the float bowl. No more need for expletives!
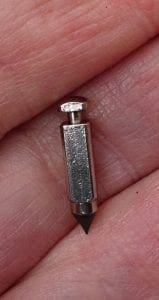
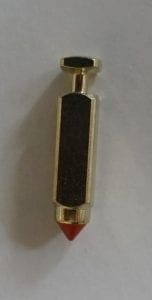
The replacement of the needle valve is best described by means of the pictures that accompany this article and, all that really needs to be mentioned is, that the correct replacement needle valve will have a red rubberised tip – not black. Generally, all scooter carbs work in the same manner and the pictured results can be applied to any standard Dell’Orto carb.
Vespita